The 2018 release of Autodesk’s AEC Collection makes it easier than ever to coordinate, geo-locate and collaborate between InfraWorks, Civil 3D, Revit, taking it all into Navisworks and beyond to a VR experience. And with just 5 simple steps, it’s probably easier than you may think.
The Team Players
First, let’s look at the players of our collaboration team – InfraWorks, Civil 3D, Revit, Navisworks and Live.
 It’s probably important to note at this point that Live is NOT part of the AEC Collection, but rather is a separate subscription. And at $250 per license per year, and its ability to quickly go from from Revit to an immersive VR experience, the investment is well worth it.
5 Steps for Collaboration

The workflow outlined below assumes that you currently have no digital data; all you have is the proposed job site address. The workflow will begin by creating an existing conditions model using InfraWorks’ Model Builder. From there, the existing conditions model will be brought into AutoCAD Civil 3D using the new InfraWorks ribbon tools. Next, it’s on to geo-locating the site plan within Revit. Once the InfraWorks, Civil 3D and Revit models are geo-located and in sync with each other, they can be pulled together into Navisworks for coordination. And finally, we’ll look at two ways to push the combined data to a VR experience.
Step 1 – InfraWorks
Creating the existing conditions model using InfraWorks’ Model Builder is probably the fastest and easiest way. With nothing more than an address and a few clicks of the mouse you can go from having no data to a fully-interactive 3D digital model in InfraWorks. If you’re new to InfraWorks, you can read more about the basics in my February 2017 AUGIWorld article, “InfraWorks – A Brief Overview for Beginners”.
Step 2 – Civil 3D
Once the InfraWorks model is created it’s extremely simple with the 2018 release of AutoCAD Civil 3D to import the existing terrain and roadway alignments using the Open Model command on the InfraWorks panel. Simply select the InfraWorks .sqlite file, select an area of interest (AOI) and Civil 3D takes care of the rest.

Step 3 – Revit
The next step is to geo-locate the Revit model on the AutoCAD Civil 3D site plan. To do this link in the DWG site plan, rotate it, set the elevation then acquire the coordinates.

To verify that the coordinates were acquired successfully, you can click on Manage > Location and note the location change.

Once you’ve acquired the coordinates you can remove the DWG link. At this point the InfraWorks, Revit and Civil 3D models are in sync and can easily be exported/imported into one another using Shared Coordinates in Revit or 0,0,0 as the insertion point within Civil 3D.
Step 4 – Navisworks
Now that InfraWorks, Revit and AutoCAD Civil 3D are all in perfect harmony, you can combine them all into Navisworks for review, coordination, clash detection and share the combined NWD file with clients, owners, construction managers, etc. Or you can create a VR experience using the Autodesk cloud rendering service to render a view to a Stereo Panorama which leads us to the final step….
Step 5 – VR Experience
Navisworks and Autodesk’s cloud rendering service make it quick and simple to create a simple 360° panorama rendering.

Enter a caption
I refer to this as the “Poor Man’s VR” because you don’t need any fancy VR headgear (or even the inexpensive cardboard-type of viewer). All you need is a web browser. Once the cloud rendering service generates the panorama you can share the link and anyone can view it from their desktop browser or on their mobile phone browser.

Poor Man’s VR
You can take it one step farther and create a stereo panorama. This is the kind of VR experience that requires a headset or a cardboard-type of viewer.
Just like the 360° panorama, the stereo panorama is easy to create, thanks to Autodesk’s cloud rendering service. A few click of the mouse takes you from the desktop to VR.
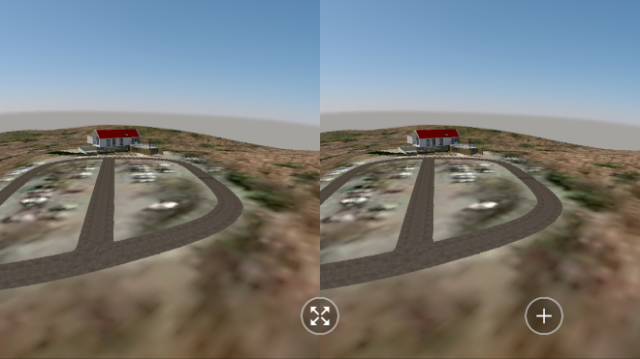
Stereo Panorama
To take the VR experience even farther, export from Revit using Live. You can import the terrain data from AutoCAD Civil 3D into Revit using the Site Designer add-in and LandXML data of the contours.


Once the topography is in the Revit model (it should fall right into place since they’re all geo-located and in sync with each other), it’s a few clicks of the mouse to take your Revit model to Live.


And just like the “Poor Man’s VR”, you can share the model with someone (they’ll need to download and install the Live Viewer) or you can view it in a true VR experience by clicking on the VR icon in the lower-right.

The YouTube video below will walk you through all of the steps and settings necessary for quick, successful collaboration across the AEC Collection of products.
![]()
